
Introduction to WiCheck
In the earlier post, we have discussed packet editors and how you can create your own packet sequence. In this article, we will explain in detail how to inject probe packets with WiCheck to test how well your AP can handle pre-defined packets – custom, malformed, malicious or normal from a single client or from 100s of clients at a time
SWAT WiCheck is a modular and programmable Wi-Fi multi client simulator that can scale to 100s of 802.11 a/b/g/n/ac/ax clients. All the clients act exactly like real users with up to 8 spatial streams in the Wi-Fi6 variant. It runs real applications with exhaustive security options and integrates with other test frameworks as well. SWAT WiCheck is available in multiple form factors to meet different customer needs. You have the option of a different variant for Lab to Field and now – if you are stuck during lockdowns – for Home as well.
Any kind of packet can be modified and then injected using the WiCheck clients. WiCheck provides an interface to allow true wireless packets (Pcap with radiotap headers) to be injected and injection can be performed from each client. This will be an added advantage during testing.
We will perform a Packet injection to test how well AP responds. Certain packets (probe requests) are modified and injected from the client to AP to test how AP responds to the client.This is measured by the probe responses received by the client.
Injection Of Directed Probe Packets With WiCheck Clients
Packet injection with WiCheck can be done in 5 easy steps.
- Select a Pcap file
- Modify if needed
- Configure Packet Injection traffic
- Capture packets using Monitor Mode
- Run traffic
Below are the steps in detail:
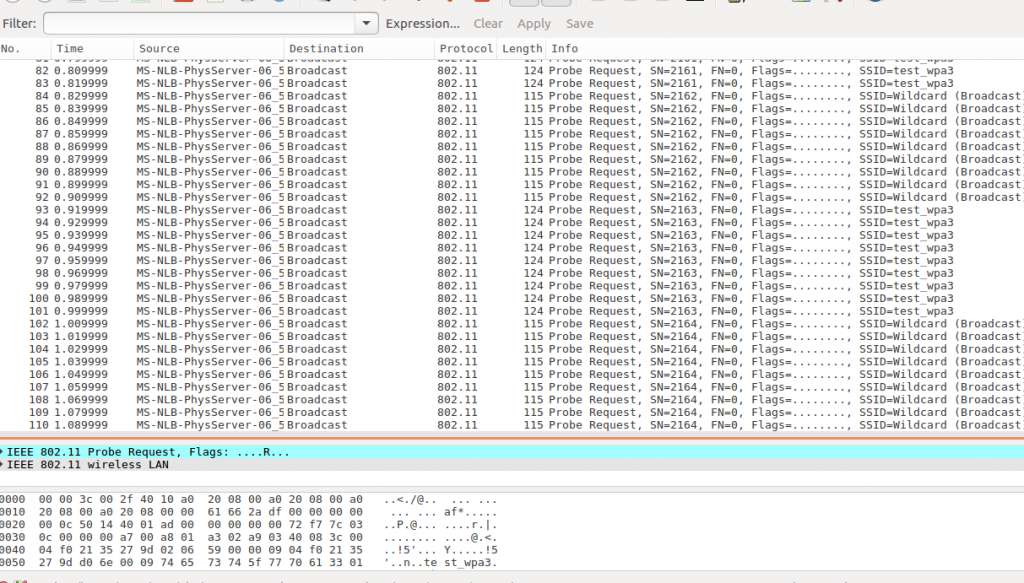
- Select a Pcap file that contains the probe request packets for packet injection. Observing the timestamps of the packets in the picture below it will take a long time to send the packets so we will have to reduce the total time.

- Editing of Pcap files using Scapy
Below is the python script used for changing the timestamps. In the script, each packet will be created such that it has a time gap of 10 ms each.
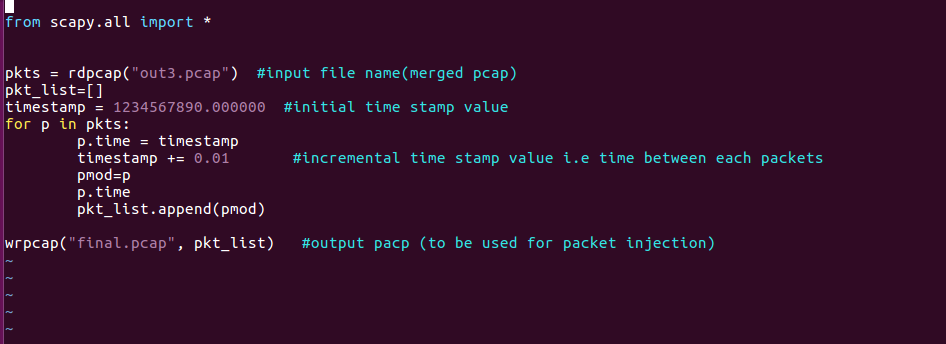
In the above screenshot, you can see that the timestamps have changed and total time is nearly 1 second and 100 milliseconds.
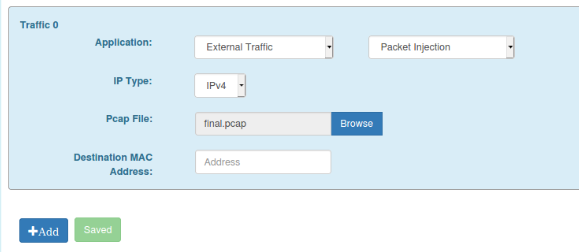
- Configure Packet Injection traffic in WiCheck
- Go to Traffic Configuration
- Select the file we just created
- Select the source MAC address you want to use
- Save the configuration
- Standard capture of Wi-Fi packets via monitor interface on WiCheck
- Turn ON monitor mode in WiCheck.
- Command to be given on terminal to start Wireshark (Wireshark must be installed on the machine)
- Wireshark screen will pop-up as shown in the image below
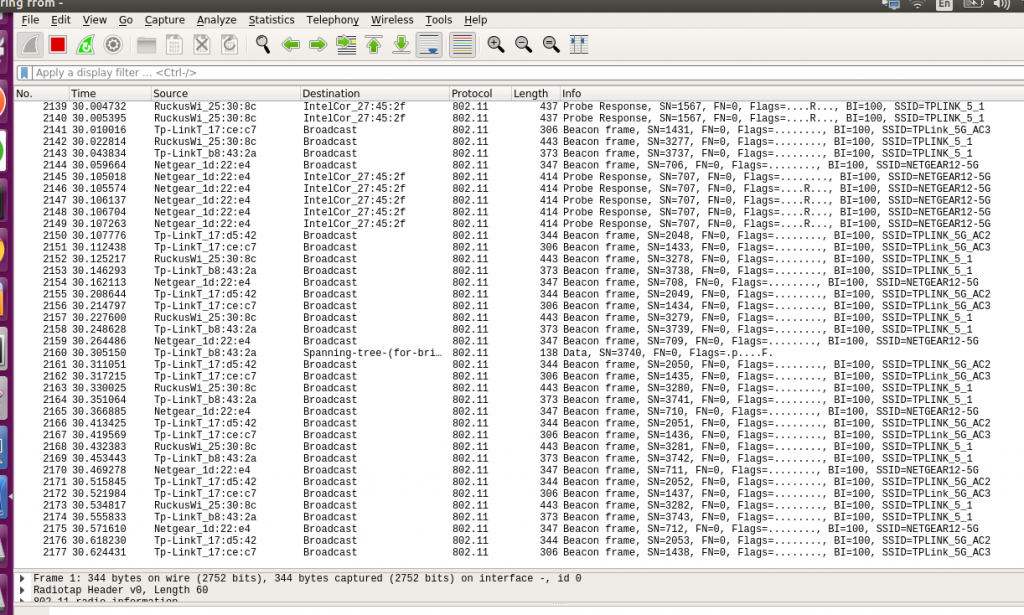
- Start the traffic on WiCheck now
Once the traffic is completed, stop the capture on wireshark and save it.
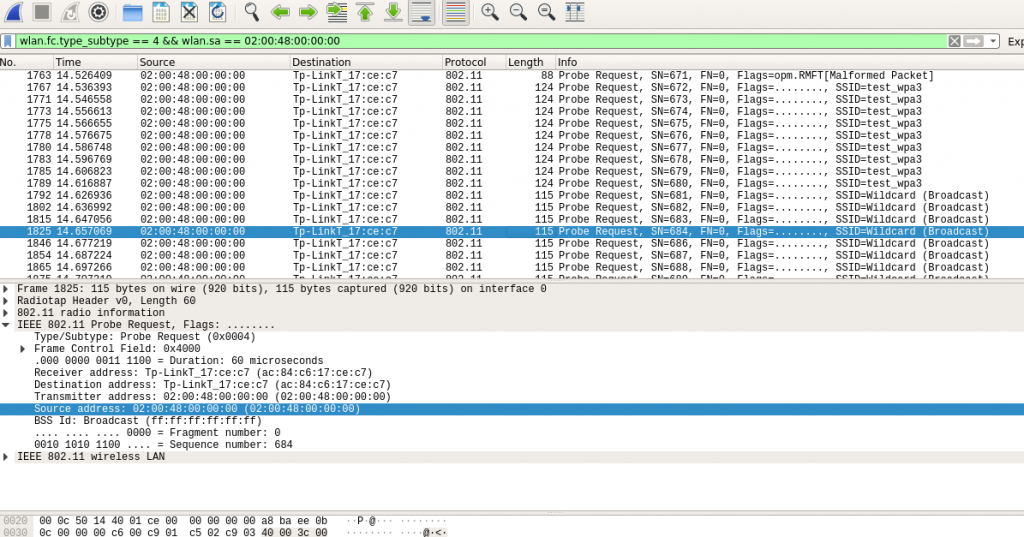
Apply filters to get probe requests from a single client (use client MAC address). You can see the directed probe requests to single AP.
The image below shows probe response from the AP .
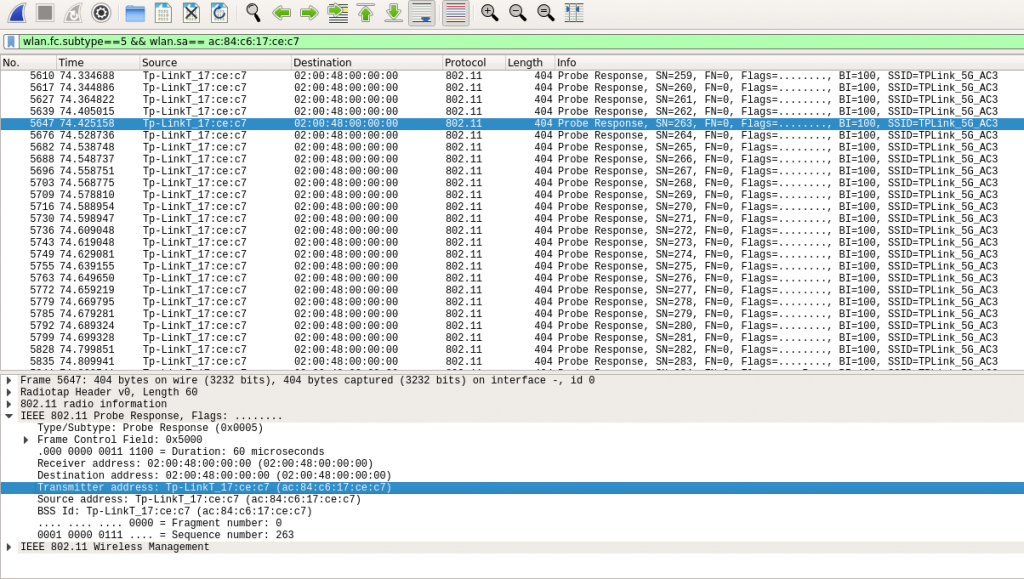
The count of probe responses received indicates how well the probes are handled by the AP. It was observed that AP responded well up to 60 probe requests in 1 second.
As WiCheck emulates 100s of clients, packet injection can be performed by all clients individually, so network equipment vendors can test such a scenario with multiple clients simultaneously.
P.S. We also have a Wi-Fi 6 test equipment that can run Packet Injection traffic, emulate 100s of Wi-Fi 6 / 802.11ax clients to test at scale. It’s capable of recreating high density environments with 100s of users, accessing multiple applications like VoIP, video streaming, browsing, downloading etc simultaneously.